Summer Chimney Checklist: Prevent Odors, Moisture Damage, and Animal Nests
Author: Sean Summers, NFI Master Hearth Certified Technician – WoodstovePro.com
When heating season ends, your chimney doesn’t stop working—it just changes jobs.
All summer long, it’s exposed to humidity, storms, wind, and curious wildlife looking for shelter. A little chimney maintenance now helps prevent three common warm-weather problems: stale smoke odors, moisture-related damage, and animal nests that block airflow when you’re ready to burn again.
Use this simple summer chimney checklist to protect your system before fall.
Why summer is the best time for chimney maintenance
Warm weather is ideal for inspections and repairs because masonry dries faster and service schedules are often more open than the fall rush. It’s also when small issues—like a missing cap or tiny leak—can quietly become bigger water damage problems. Getting ahead of it now makes the first fire of the season easier, cleaner, and safer.
Step 1: Clean out ash and firebox residue (odor prevention starts here)
Old ash and soot can hold moisture and create a musty, smoky smell that drifts into the home during humid months. After your last fire:
- remove ashes into a lidded metal container
- brush/vacuum the firebox area (use an ash-rated vacuum if needed)
- wipe down hearth surfaces so soot isn’t lingering
This is one of the simplest odor-prevention steps you can take.
Step 2: Schedule a chimney inspection in the off-season
A professional inspection can catch damage you won’t see from inside the firebox—like crown cracks, flashing issues, liner problems, or early signs of water intrusion. Summer inspections are also helpful if you had draft issues, smoke smell, or heavier creosote last season. A clean bill of health now prevents last-minute surprises later.
Step 3: Check your chimney cap and termination
Your chimney cap is your first line of defense against rain, debris, and animals. If your system doesn’t have one—or if it’s damaged—you’re far more likely to deal with animal nests and moisture problems.
What to look for (from the ground, binoculars help):
- Missing cap or loose cap
- Damaged mesh
- Signs of blockage
- Obvious rust or warping
A properly fitted chimney cap supports odor prevention and helps keep animal nests out of the flue.
Step 4: Protect against water intrusion and moisture damage
Moisture is the biggest long-term threat to chimneys. Summer storms can push water into weak spots, and humid air can worsen existing issues. Pay attention to cracking at the chimney crown, staining on chimney masonry, rust on dampers or metal components, and musty smells after rain.
If you’ve had roof leaks near the chimney, have flashing checked. If the masonry is absorbing water, discuss waterproofing with a professional as part of chimney maintenance.
Step 5: Prevent animal nests before nesting season peaks
Birds, squirrels, raccoons, and other wildlife love chimney chases and flues because they’re sheltered and quiet in summer. Animal nests can block draft, create smoke backup, and introduce odors or debris into the home.
The best prevention is straightforward:
- Make sure you have a secure chimney cap with intact mesh
- Address chase cover issues if you have a framed chimney chase
- Don’t leave the fireplace damper open all summer in a way that invites debris (follow your appliance guidance)
If you suspect animal activity, don’t try to remove nests yourself; schedule professional help.
Final thoughts
A summer chimney checklist is one of the easiest ways to protect your home. Keep up with chimney maintenance, verify your chimney cap is doing its job, and address moisture issues early to prevent odors, water damage, and animal nests. Your chimney will be ready when the first cool night returns, and you’ll avoid the busiest-season scramble.
Need help with chimney caps, maintenance accessories, or planning your off-season chimney checklist? Contact our certified hearth professionals at 888-418-0005 or info@woodstovepro.com.
Electric Fireplace Heat Settings Explained: Best Use for Zone Heating
Author: Sean Summers, NFI Master Hearth Certified Technician – WoodstovePro.com
Electric fireplaces are popular because they’re simple: you get instant ambiance, and when you want it, quick supplemental heat. But many homeowners don’t use the heat settings in the most efficient way. With a few smart habits, electric fireplace heat can support zone heating, improve comfort in the rooms you actually use, and help manage electricity usage and electric fireplace cost.
This guide explains what common heat settings mean, how to use them strategically, and how to avoid the most common “why is my bill higher?” mistakes.
What electric fireplace heat settings actually control
Most electric fireplaces let you control the flame effect and the heater separately. The flame is usually powered by LEDs and uses relatively little electricity compared to the heater. The heater is where most electricity usage comes from.
Typical controls you’ll see include:
- Flame only (no heat)
- Low heat and high heat
- Thermostat mode (sets a target temperature)
- Timer mode (turns off after a set period)
Some units also have eco modes or multiple heat levels, but the concept is the same: heat settings determine how much the heater runs and for how long.
Why zone heating is the best way to use an electric fireplace
Zone heating means heating the room you’re in instead of trying to heat the entire home to the same temperature. An electric fireplace works well for zone heating because it can add comfort to a living room, office, bedroom, or basement without raising the thermostat for the whole house.
This is where electric fireplace cost can become more reasonable. If you can lower your main thermostat a couple of degrees and use the electric fireplace in your primary room, you may reduce whole-home heating demand while staying comfortable.
Low vs high heat: when to use each setting
Low heat is usually best for maintaining comfort once the room feels warm. It’s quieter, steadier, and often enough for most small-to-medium spaces.
High heat is best for quick warm-up. Use it to bring a chilly room up to comfort faster, then step down to low or thermostat mode.
A simple approach that works in many homes: run high for a short warm-up, then switch to low to maintain.
Thermostat mode: the “set it and forget it” option
Thermostat mode helps control electricity usage because the heater cycles on and off to maintain a target temperature instead of running nonstop. It’s one of the best tools for zone heating, especially if you’re working in a room for several hours.
Thermostat mode is also helpful overnight in a bedroom when you want stable comfort without continuous high output. Always follow your unit’s safety and usage guidance for extended operation.
Timer mode: the easiest way to control electric fireplace cost
If you tend to fall asleep with the heater on or leave the room and forget it’s running, timer mode is your best friend. A timer is a simple way to prevent long, unnecessary run time that increases electricity usage.
If your unit has a timer, use it as your default setting when you turn the heat on. Even a one- or two-hour timer can make a difference over a season.
Flame-only mode: ambiance without the electricity usage spike
Many homeowners assume they’re “using the fireplace” when they see flames. In reality, flame-only mode is usually the lowest-cost way to enjoy the look, because the heater is off. If you want ambiance but don’t need extra warmth, flame-only is the best choice for keeping electric fireplace cost low.
How to get better heat results from placement and airflow
Heat settings matter, but room setup matters too. For better zone heating:
- Close the door to the room so heat stays where you want it
- Avoid blocking the heater outlet with furniture or rugs
- Keep the unit away from drafty doors if possible
- Use a ceiling fan on low to circulate warm air (if available)
You’ll often feel more warmth without increasing heat settings just by improving airflow and containing the zone.
Common mistakes that raise electric fireplace cost
A few habits can make electricity usage climb quickly:
- Running the heater all day in an open floor plan without zone control
- Using high heat continuously instead of stepping down
- Blocking the heat outlet so the unit works harder or cycles inefficiently
- Relying on the electric fireplace as whole-home heat rather than supplemental zone heating
- Skipping thermostat and timer features
Using the right setting at the right time is the simplest fix.
Final thoughts
Electric fireplace heat works best when you use it intentionally. Start with zone heating: warm the room you’re actually using, then maintain comfort with low heat or thermostat mode. Use timer mode to prevent unnecessary runtime, and enjoy flame-only ambiance when you don’t need heat. These simple changes can improve comfort while keeping electricity usage and electric fireplace cost more predictable.
Need help choosing an electric fireplace for your room size or figuring out the best placement for zone heating? Contact our hearth professionals at 888-418-0005 or info@woodstovepro.com.
“My Fireplace Smells Like Gas”: What to Do and When to Shut It Off
Author: Sean Summers, NFI Master Hearth Certified Technician – WoodstovePro.com
A gas fireplace should never make you feel uncertain about safety. Some odors can be normal in specific situations, but a persistent gas smell should always be treated seriously. The goal is to respond calmly, take the right steps for gas leak safety, and know when to shut the system down and call for help.
This guide explains what a gas fireplace smell can mean, what to do right away, and when an inspection is the right next step.
First, know the difference between a normal “first-use” odor and a gas smell
Not every odor is a leak. New fireplaces, or fireplaces that haven’t run in months, can produce a temporary “burn-off” smell as dust heats up or manufacturing residues finish curing. This tends to smell more like hot metal, dust, or mild smoke and usually fades after the first few uses.
A true gas fireplace smell is typically sharper and more chemical-like (often compared to “rotten eggs,” because odorant is added to gas). If you suspect that type of smell, treat it as a safety issue and follow the steps below.
What to do immediately if you smell gas
If you notice a gas odor, prioritize gas fireplace safety over troubleshooting.
Do this right away:
- Turn the fireplace off.
- Open windows and doors to ventilate the area.
- Do not light matches or candles.
- Do not use electrical switches if the smell is strong (turning switches on/off can create a tiny spark).
- If the smell is strong or increasing, leave the home and call your gas utility or emergency services from outside.
These steps are the foundation of gas leak safety, even if you’re not 100% sure what you’re smelling.
When you should shut it off and stop troubleshooting
Stop using the fireplace and treat it as urgent if any of the following apply:
- The smell is strong, persistent, or getting worse
- You smell gas near the floor (natural gas rises, propane is heavier than air and can settle)
- You hear hissing near the fireplace or gas line
- You feel lightheaded, nauseous, or get a headache
- You see soot, scorching, or unusual flame behavior along with the smell
In these situations, do not attempt further checks. Shut it down, ventilate, and contact the gas company or a qualified technician.
Common reasons you might notice a gas smell around a fireplace
A gas smell can happen for different reasons, and some are more serious than others. A few common causes include:
- A small amount of gas during startup or shutdown. Some units may release a brief whiff near ignition or when the burner shuts off. That should be faint and short-lived. If it lingers, it’s not normal.
- Pilot or burner issues. A pilot flame that’s weak, dirty, or misaligned can cause incomplete ignition or delayed ignition behavior. This can create odors and should be addressed with service.
- Log placement or sooting. If logs or media are positioned incorrectly, flames can hit them in the wrong way, leading to soot and odor issues. Heavy sooting is a reason to stop use and schedule an inspection.
- Venting problems. Direct vent and other vented systems need proper airflow. If venting is blocked, disconnected, or compromised, odors can appear and safety can be affected.
- Loose fittings or valve issues. Any leak at the shutoff, flex line, connections, or valve area requires professional attention.
Safe checks you can do if the smell is faint and brief
If you only notice a very mild odor momentarily and it goes away quickly, you can do a few low-risk checks. If at any point the smell returns or increases, stop and follow the safety steps above.
You can:
- Confirm the fireplace is off and the remote/wall switch isn’t calling for heat
- Look for obvious signs of soot or abnormal flame behavior through the glass
- Ensure the area around the unit is free of dust buildup that could burn off and smell
- Note whether the smell happens only at startup/shutdown or persists continuously
Avoid taking panels off, adjusting gas components, or trying DIY repairs. Gas systems should be serviced by qualified professionals.
Why an inspection is the smartest next step
If you’re experiencing a recurring gas fireplace smell, scheduling a professional inspection is the right move. A technician can:
- Perform a proper leak test at fittings and valves
- Inspect the pilot assembly, burner, and ignition system
- Verify correct flame pattern and combustion behavior
- Check venting integrity and termination condition
- Confirm safe operation under manufacturer specs
A routine inspection is also a good idea at the start of heating season, even if everything “seems fine.”
Final thoughts
A gas fireplace smell should always be taken seriously. If it’s strong, persistent, or increasing, shut the fireplace off, ventilate, and contact your gas utility or a qualified technician. For repeated mild odors or performance concerns, schedule an inspection to protect gas fireplace safety and keep your system operating the way it should.
If you have questions about maintenance, troubleshooting, or service readiness, contact our certified hearth professionals at 888-418-0005 or info@woodstovepro.com.
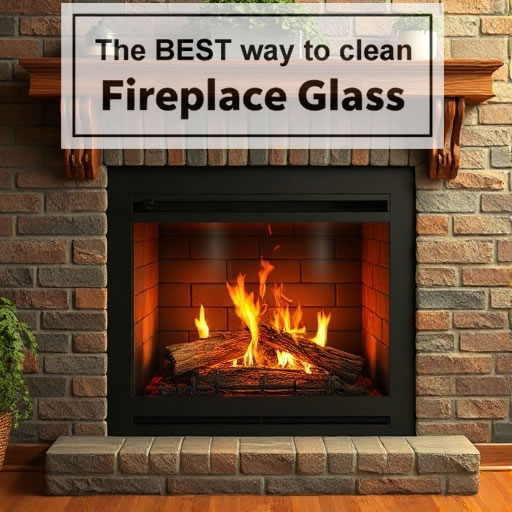
The Best Way to Clean Fireplace Glass (Without Scratching or Haze)
Author: Sean Summers, NFI Master Hearth Certified Technician – WoodstovePro.com
There’s nothing like a roaring fire behind clear glass. But once soot builds up, many homeowners reach for the wrong cleaner or the wrong tool and end up with scratches, cloudy haze, or streaks that never seem to go away. The good news is you can clean fireplace glass safely and get it crystal clear again - if you use the right method for your type of fireplace and you avoid a few common mistakes.
This guide walks you through the best approach to clean fireplace glass without scratching it and how to prevent that stubborn “foggy” look that shows up after wiping.
First, make sure the glass is completely cool
This is the most important rule in fireplace cleaning. Never clean hot or even warm glass. Rapid temperature changes can stress the glass, and many cleaners can leave permanent marks if applied while the surface is warm. Let the fireplace cool fully, then start your cleaning routine.
Identify what kind of soot you’re dealing with
Not all glass buildup is the same. Wood-burning fireplaces tend to create dry soot and smoke film. Gas fireplaces can create light film, but heavy black buildup can indicate log placement or combustion issues. The goal is to remove the film without grinding debris into the surface.
If you’re cleaning fireplace glass doors on a gas unit and the glass keeps turning black quickly, that’s a sign to check for service rather than just cleaning more often.
The safest cleaning method for most fireplaces
For everyday soot and light buildup, the best approach is gentle cleaning with the right materials.
What to use:
- a soft microfiber cloth
- a non-scratch sponge or soft paper towel
- a fireplace glass cleaner made for stove/fireplace use
- warm water for the final rinse wipe
How to do it:
- Wipe loose dust and soot away first with a dry microfiber cloth.
- Apply cleaner to the cloth (not directly on the glass if the manufacturer advises against spraying).
- Wipe in small sections, using light pressure.
- Follow with a clean damp cloth to remove any residue.
- Dry with a fresh microfiber cloth to prevent haze.
This method prevents scratches and removes the cleaner residue that often causes streaks.
The “ash paste” trick (only for wood soot, and only when done gently)
A common old-school method uses a tiny amount of fine ash as a mild abrasive. This can work well for wood soot, but it has to be done carefully.
If you use it:
- make sure ashes are cold and very fine (no gritty chunks)
- dampen a cloth and lightly dip into ash
- rub gently in small circles, then wipe clean with water
- finish with a dry microfiber cloth
Do not use ash paste on glass with gritty debris, and don’t use it on specialty coated glass unless the manufacturer allows it.
What causes scratches and haze (and how to avoid both)
Most scratches come from using abrasive tools or rubbing soot and grit across the glass.
Avoid steel wool, razor blades, abrasive scrub pads, gritty paper towels, scrubbing hard before removing loose soot, and harsh household cleaners not made for fireplace glass
Haze is usually leftover residue—either from cleaner film or from minerals in the water used to wipe down.
To prevent haze, always do a final wipe with a clean damp cloth, dry with a microfiber cloth immediately, switch to distilled water for the final wipe if your tap water is hard, and don’t overuse cleaner; a little goes a long way.
How to keep glass cleaner longer
If you want to clean less often, focus on burn quality and airflow.
Helpful habits:
- burn only seasoned wood in wood-burning units
- avoid smoldering fires that create heavy soot
- keep air pathways open and follow manufacturer operating guidance
- for gas fireplaces, make sure log placement matches the manual and schedule a service check if sooting is heavy
Cleaner burns = cleaner glass, and it’s one of the simplest “maintenance multipliers” you can use.
When black glass is a service issue, not a cleaning issue
If your gas fireplace glass turns black quickly, or you notice unusual odors, lazy yellow flames, or soot on nearby surfaces, stop and schedule professional service. Persistent sooting can signal incorrect log placement, burner issues, venting problems, or an air-to-fuel imbalance.
Final thoughts
The best way to clean fireplace glass is gentle, consistent, and residue-free. Use the right fireplace-safe cleaner, remove loose soot before wiping, avoid abrasive tools, and finish with a clean rinse wipe and microfiber dry. With the right process, your fireplace glass doors can stay clear without scratching or haze, and your hearth will look better every time you light a fire.
If you need the right fireplace accessories for cleaning and maintenance, contact our certified hearth professionals at 888-418-0005 or info@woodstovepro.com.
Chimney Waterproofing: What Works, What Doesn’t, and When You Need It
Author: Sean Summers, NFI Master Hearth Certified Technician – WoodstovePro.com
Water is the quiet enemy of almost every masonry chimney. A chimney sits fully exposed to rain, snow, freeze/thaw cycles, and wind-driven moisture, so it’s no surprise that many chimney problems start as moisture problems. Chimney waterproofing can help, but only when it’s done the right way and for the right reasons. The wrong product or the wrong timing can trap moisture and make water damage worse.
This guide explains what actually works, what doesn’t, and how to decide whether chimney waterproofing belongs on your chimney maintenance checklist.
What chimney waterproofing actually is
Chimney waterproofing typically means applying a breathable masonry sealer to the exterior brick and mortar so the chimney sheds water instead of soaking it in. “Breathable” is the key word. Masonry needs to release water vapor. A quality masonry sealer helps reduce water absorption while still allowing the chimney to dry out after wet weather.
Waterproofing is not the same thing as fixing leaks. If your chimney has crown cracks, failed flashing, missing caps, or damaged mortar joints, a sealer won’t solve the root issue.
What works for chimney waterproofing
In most cases, a breathable, exterior-grade masonry sealer is the correct approach for masonry chimneys that are structurally sound but absorb moisture.
What generally works well:
- A breathable masonry sealer designed for brick and mortar
- Proper surface preparation (clean, dry masonry)
- Application during appropriate weather (no rain expected, above minimum temp)
- Waterproofing after repairs are completed (crown, mortar, flashing)
Waterproofing works best as preventive chimney maintenance, not as a last-ditch fix for active leaks.
What doesn’t work (and can make water damage worse)
Many “quick fix” solutions fail because they block breathability or mask the real leak source.
Common approaches that don’t work well:
- Painting the chimney with non-breathable coatings
- Using generic waterproof paint or elastomeric coatings not intended for chimneys
- Smearing tar/roof cement around masonry as a permanent solution
- Sealing over active cracks without repairing them
- Waterproofing a chimney that has flashing failure or a damaged crown
If moisture is already inside the chimney, trapping it can accelerate spalling brick, mortar deterioration, and hidden structural issues.
When you actually need chimney waterproofing
Not every chimney needs sealing, but many do—especially in wet climates or when the chimney shows early signs of moisture absorption.
Chimney waterproofing can be a good idea when:
- Brick absorbs water quickly after rain
- You notice white staining (efflorescence) on the chimney exterior
- Mortar joints look soft or sandy but not structurally failed
- The chimney faces heavy wind-driven rain or snow
- You’ve repaired crown/mortar issues and want long-term protection
If you have repeated interior stains, active leaks, or musty odors, start with inspection and repairs before applying a sealer.
Where to link products: chimney inspection tools or chimney caps as part of a “complete moisture defense” approach.
The real causes of chimney leaks (waterproofing won’t fix these)
A lot of homeowners blame the bricks when the real leak is at the top or roofline. These issues require repair, not sealing:
- Cracked or failing chimney crown
- Missing or damaged chimney cap
- Rusted chase cover (for chase chimneys)
- Failed chimney flashing around the roof penetration
- Damaged mortar joints that need tuckpointing
- Liner or flue tile issues allowing moisture intrusion
A proper chimney maintenance plan addresses these first. Waterproofing is the final protective layer after the leak sources are corrected.
How to apply a masonry sealer the right way
Surface prep and timing determine whether chimney waterproofing actually works.
Best practices:
- Apply only to clean, dry masonry (moisture trapped inside reduces results)
- Avoid sealing in rainy periods or freezing temperatures
- Follow cure-time instructions so the sealer sets correctly
- Don’t seal over crumbling mortar or active cracks—repair first
- Consider a professional application for tall chimneys and roof safety
Even a great masonry sealer won’t perform if it’s applied over wet brick or over active damage.
Final thoughts
Chimney waterproofing can be an excellent preventive step, but it’s not a magic fix. The best approach is to correct the true leak sources first (crown, cap, flashing, and mortar), then apply a breathable masonry sealer to reduce ongoing water absorption. Done correctly, waterproofing supports long-term chimney maintenance and helps prevent water damage that can shorten the life of a chimney system.
If you need help choosing the right chimney moisture protection approach, contact our certified hearth professionals at 888-418-0005 or info@woodstovepro.com.
Chimney Troubleshooting 101: Smoke Smell, Draft Problems, and What to Check First
Author: Sean Summers, NFI Master Hearth Certified Technician – WoodstovePro.com
A cozy fire shouldn’t come with a lingering smoke smell in your home. If you’re noticing odors, weak draft, smoke spillage, or inconsistent burning, you’re likely dealing with a few common causes that affect chimney draft and overall chimney safety. The key is troubleshooting in the right order. Start with simple, high-impact checks before assuming you need major repairs.
This “Chimney Troubleshooting 101” guide walks you through the most common symptoms, what they usually mean, and what to do next.
Why do chimney problems happen in the first place?
Chimneys work by creating draft: hot exhaust rises, which pulls fresh air into the appliance. When draft is weak, smoke can linger, spill, or backdraft. Chimney performance is most commonly impacted by:
- Blockages (creosote, nests, debris)
- Cold flues and cold starts
- Incorrect chimney height or termination location
- Poor vent configuration (too many elbows/horizontal runs)
- Home airflow issues like negative pressure
- Wet wood or low-temperature burns that increase buildup
Symptom 1: Smoke smell in the house (even when the fireplace isn’t in use)
A persistent smoke smell is one of the most common complaints. It can come from:
Likely causes
- Creosote odor trapped in the flue, especially in humid weather
- A missing/damaged chimney cap letting rain in (wet creosote smells stronger)
- Negative pressure pulling chimney air back into the house
- A dirty firebox or ash left too long
- Downdrafts caused by wind, rooflines, or nearby trees
What to check first
- Make sure the damper is fully closed when the fireplace is off (for wood-burning fireplaces)
- Remove old ash and clean the firebox area
- Check for a chimney cap and verify it isn’t clogged or missing
- If smell worsens on windy days, draft/downdraft is likely involved
If odor is strong and persistent, schedule a professional chimney cleaning and inspection.
Symptom 2: Smoke rolls into the room when you start a fire
This is usually a draft issue, especially with a cold chimney.
Likely causes
- Cold air “plug” in the flue (common in exterior chimneys)
- Weak chimney draft from short chimney height or poor termination
- House is under negative pressure (kitchen hood, dryer, bathroom fans running)
- Flue is partially blocked by creosote or debris
What to check first
- Open the damper fully before lighting
- Start with a hotter kindling fire (small, dry splits)
- Crack a nearby window for 5–10 minutes during startup (tests for negative pressure)
- Stop using the system if smoke is heavy or continuous and schedule an inspection
Symptom 3: Fire won’t stay lit or burns sluggishly
A lazy flame usually means restricted airflow or poor fuel quality.
Likely causes
- Wet or unseasoned wood
- Chimney needs cleaning (restriction reduces draft)
- Air controls not opening properly
- Excess ash restricting airflow (for stoves/inserts)
What to check first
- Confirm wood is seasoned (under ~20% moisture)
- Clean the stove’s air pathways and remove excess ash
- Check baffle/secondary burn components (if accessible and per manual)
- Schedule a cleaning if draft feels weak or performance dropped over time
Symptom 4: Smoke smell is worse when exhaust fans run
This is a classic sign of negative pressure.
What is negative pressure?
Negative pressure happens when your home is pulling air out faster than it can replace it. That can reverse draft or reduce it enough that smoke and odors come back into the home.
Common causes
- Range hood running
- Clothes dryer running
- Bathroom fans
- Very tight, well-sealed homes (new windows/insulation)
What to do
- Crack a window during startup
- Avoid running major exhaust fans during lighting and early burn
- Consider makeup air solutions if the issue is frequent (a pro can advise)
Symptom 5: You hear “whooshing,” popping, or see excessive soot/creosote
These are red flags for chimney safety.
Possible causes
- Heavy creosote buildup
- Smoldering burns and wet wood
- Venting configuration causing poor exhaust flow
- Past chimney fire activity
What to do
- Stop using the fireplace/stove until it’s inspected
- Schedule professional cleaning and a chimney inspection ASAP
- Do not “burn it hotter to clean it out”—that can ignite creosote
When to call a pro (don’t wait)
Schedule service immediately if you notice:
- Persistent smoke spillage
- Strong odor that doesn’t improve after cleaning the firebox
- Signs of water intrusion, rust, or staining
- Heavy creosote flakes or shiny glazed buildup
- Any suspected chimney fire (loud roaring, sparks, intense heat)
A professional can assess draft performance, liner condition, creosote levels, and safety clearances, things homeowners can’t reliably confirm without tools and training.
Final thoughts
Most chimney issues come down to three areas: airflow, fuel, and maintenance. Addressing smoke smell, improving chimney draft, and reducing negative pressure are the most effective first steps—and they also support long-term chimney safety. When symptoms persist or safety is uncertain, a certified inspection is always the right call.
Need chimney accessories, caps, cleaning tools, or help troubleshooting your setup? Contact our certified hearth professionals at 888-418-0005 or info@woodstovepro.com.
Gas Fireplace Remote Not Working? Easy Fixes Before You Call for Service
Author: Sean Summers, NFI Master Hearth Certified Technician – WoodstovePro.com
A gas fireplace remote is convenient, but it adds a few extra points of failure: batteries, signal range, receiver settings, and sometimes a wall switch in the same control chain. The good news is that most “remote not working” situations are solved with quick checks at home. Before you schedule service, work through the steps below in order—this approach fixes the majority of common gas fireplace troubleshooting calls.
Step 1: Start with the batteries (both remote and receiver)
Low power is the #1 reason a gas fireplace remote stops responding. Many systems have batteries in more than one place.
Check:
- Batteries in the handheld remote
- Batteries in the receiver (often located behind the lower grill, under the firebox, or near the control compartment)
Even if the remote screen lights up, weak batteries can prevent it from sending a strong signal. Replace batteries with fresh ones, and make sure they’re installed in the correct orientation.
Step 2: Make sure the receiver is turned on (not in OFF mode)
Many receivers have a small switch with settings like ON / OFF / REMOTE.
Confirm the receiver is set to:
- REMOTE (to allow handheld control), or
- ON (to run continuously as a test)
If it’s set to OFF, the remote won’t be able to turn the fireplace on.
Step 3: Check the wall switch (it can override the remote)
If you have a wall switch, it may need to be in a specific position for the remote to work. Homeowners often bump the switch accidentally, especially during cleaning or when guests are over.
For gas fireplace troubleshooting, try:
- Toggle the wall switch OFF then ON
- If the fireplace turns on via wall switch, but not remote, you’ve narrowed the issue to the remote/receiver side
- If neither works, keep going down the checklist (or you may be dealing with a separate ignition/safety issue)
Step 4: Look for a “child lock” or thermostat mode on the remote
Some remotes have features that can make it look like the fireplace is “dead”:
- Child lock enabled
- Thermostat mode set to a low temperature (so it won’t call for heat)
- Timer mode set to OFF cycles
- Flame height set to minimum on systems with adjustable flame
Check your remote display for icons like a lock symbol or temperature setpoint that might prevent activation.
Step 5: Re-sync (pair) the remote to the receiver
Some systems can lose pairing after battery changes or power interruptions. If your remote and receiver aren’t communicating, you may need to re-learn the signal.
Typical steps (varies by brand):
- Turn the receiver to REMOTE
- Press the learn/sync button on the receiver (if equipped)
- Press ON on the remote within the pairing window
Follow your specific remote/receiver manual for exact pairing instructions.
Step 6: Confirm the pilot and ignition type (standing pilot vs electronic)
Not all gas fireplaces behave the same. If your unit uses:
- Standing pilot: the pilot must be lit for the main burner to fire
- Electronic ignition: it may require power or batteries depending on the system
If your remote is working but nothing happens at the fireplace, the issue might not be the remote at all—it could be the pilot, igniter, or safety sensors. That’s when troubleshooting shifts from “remote” to broader gas fireplace troubleshooting.
Step 7: Check for simple signal issues (distance and interference)
If the receiver is tucked behind metal panels or you’re standing far away, the remote signal may not reach it reliably.
Try:
- Standing closer to the fireplace
- Pointing the remote toward the receiver area
- Removing obstacles (decorative items, thick metal screens near the receiver compartment)
This is especially common in rooms with a lot of electronics or when the receiver is buried behind a closed access panel.
When to stop DIY and call for service
Call a technician if:
- You’ve replaced batteries and confirmed receiver/wall switch settings but nothing works
- The fireplace turns on briefly then shuts off
- You smell gas, see soot, or notice unusual odors
- The unit is clicking repeatedly or showing error behavior
- You suspect pilot, thermopile/millivolt components, or ignition/sensor failure
At that point, a professional can test electrical output, verify gas pressure, and inspect safety devices—things that go beyond basic homeowner checks.
Final thoughts
A non-responsive gas fireplace remote is usually a battery/receiver/wall switch issue, not a major repair. Start with fresh batteries, confirm the receiver is set correctly, check the wall switch position, and re-sync if needed. If the remote appears fine but the fireplace still won’t light, it may be time for professional gas fireplace troubleshooting to ensure safe operation.
If you need help identifying the right remote, receiver, or replacement parts for your fireplace model, contact our certified hearth professionals at 888-418-0005 or info@woodstovepro.com.
Pellet Stove Troubleshooting: Why It Won’t Ignite (Common Causes + Fixes)
Author: Sean Summers, NFI Master Hearth Certified Technician – WoodstovePro.com
When a pellet stove starts up, it feeds pellets into the burn pot while the combustion blower pulls air through the system. The igniter (often a hot-rod style igniter) heats the air or the pellets until they catch, and sensors confirm a stable flame. If any part of that chain is interrupted, you’ll run into the classic complaint: pellet stove won’t ignite. This article lays out some common problems and troubleshooting tips for a pesky pellet stove.
Safety checks before you troubleshoot
If you smell gas (rare for pellet stoves) or see smoke backing into the room, stop and ventilate the area. Otherwise, start with these simple checks:
- Confirm the stove has power and the breaker/GFCI hasn’t tripped
- Make sure the door and ash pan are fully latched (many stoves won’t start if they’re not sealed)
- Let the stove cool completely before cleaning or inspecting parts
If your unit repeatedly fails to ignite or shuts down with error codes, schedule service—especially if you’re unsure about electrical components.
Common reasons a pellet stove won’t ignite
Most ignition failures come down to airflow, fuel feed, or a failing igniter. Here are the most common causes of pellet stove troubleshooting calls:
1) Dirty burn pot (clogged air holes)
A burn pot packed with ash, clinkers, or carbon restricts airflow and prevents ignition. Even if pellets feed correctly, the fire may never establish.
Fix: clean the burn pot thoroughly, making sure the air holes are open. This is one of the highest-impact pellet stove maintenance habits you can build.
2) Ash traps and exhaust pathways are restricted
Pellet stoves rely on strong airflow. If ash traps, behind-the-panel chambers, or the exhaust path is clogged, the stove can’t draft correctly and may fail to ignite or fail to prove flame.
Fix: follow your manual’s cleaning schedule for ash traps and internal passages. If you haven’t cleaned them in a while, this is a top suspect.
3) The igniter is failing or not heating properly
A worn igniter may glow weakly or not reach the temperature needed to light pellets. This is one of the most common “pellet stove won’t ignite” causes.
Fix: if cleaning doesn’t solve it and the stove feeds pellets normally, the igniter may need replacement. Use the correct part for your model.
4) Pellets aren’t feeding into the burn pot
If there are no pellets (or very few) in the burn pot during startup, ignition can’t happen. This can be caused by a jam, bridging in the hopper, or a feed issue.
Fix:
- Confirm the hopper has pellets
- Break up any bridging (pellets “arching” and not dropping)
- Check for excessive fines (dust) in the hopper
- If the auger isn’t turning or is noisy, you may need professional service
5) Pellet quality or moisture problems
Damp pellets crumble, swell, and can create poor combustion conditions. Too many fines can also choke the burn pot and affect ignition.
Fix: switch to dry, consistent pellets and improve storage. Good pellet stove maintenance includes keeping pellets sealed and off damp concrete.
6) Door gasket leak or ash pan not sealed
Many stoves use vacuum/pressure switches. If the door or ash pan seal leaks, the stove may not reach proper vacuum and will abort startup.
Fix: ensure latches are tight, gaskets are intact, and the ash pan is properly seated. If seals are worn, replace them.
7) Combustion blower or vacuum switch issues
If the combustion blower isn’t running properly, the stove won’t draft. If the vacuum switch can’t verify airflow, the control board may prevent ignition for safety reasons.
Fix: check for obvious blockage and confirm the blower starts at startup. If it doesn’t, or if the stove errors out repeatedly, this is usually a service call.
Quick pellet stove troubleshooting checklist
If you want a simple process to follow, use this order so you don’t skip the basics:
- Clean the burn pot and confirm air holes are open
- Empty ash pan and clean ash traps per manual
- Confirm pellets are feeding into the burn pot
- Check pellet quality and remove fines from hopper
- Verify door and ash pan seals/latches
- If pellets feed but still no flame, suspect the igniter
This sequence solves a large percentage of ignition complaints.
When to call a pro (and what to tell them)
Call for service if the stove:
- Repeatedly fails to ignite after cleaning and fuel checks
- Displays persistent error codes related to vacuum, ignition, or blowers
- Shows signs of electrical failure (no blower, no feed, intermittent power)
Helpful info to share with a technician:
- Stove make/model and approximate age
- What you cleaned and when
- Whether pellets are feeding and whether the igniter glows
- Any displayed error codes or startup behavior notes
Final thoughts
When a pellet stove won’t ignite, the cause is usually one of a few fixable issues — dirty burn pot, clogged ash traps, poor pellet feed, or a failing igniter. Consistent pellet stove maintenance is the best way to avoid cold-season shutdowns. If you need help identifying parts or troubleshooting your exact model, contact our certified hearth professionals at 888-418-0005 or info@woodstovepro.com.
Wood Stove Thermometers: Where to Place Them and Which Temps Matter
Author: Sean Summers, NFI Master Hearth Certified Technician – WoodstovePro.com
A wood stove can feel simple to use, but the best burns are all about control. A thermometer helps you take the guesswork out of “too cool” versus “too hot,” so you can burn cleaner, get more heat from your wood, and reduce creosote risk. If you’re trying to improve wood stove efficiency, a wood stove thermometer is one of the most useful and inexpensive tools you can add to your setup.
Below is a practical guide on where to place a stovepipe thermometer, what temperature ranges generally matter, and how to use readings to fine-tune your burn.
Why a wood stove thermometer is worth it
Without a thermometer, many homeowners run a stove too cool to “make the wood last.” That usually leads to smoky fires, dirty glass, and faster creosote buildup. A thermometer helps you see what’s happening and make small adjustments early, which improves wood stove efficiency over the whole burn cycle.
It also helps you avoid the opposite problem: running the stove too hot for too long. Overfiring can damage components and shorten the life of the stove and venting.
Stove top vs stovepipe thermometer: what’s the difference?
There are two common types:
- A stove top thermometer reads surface temperature on the stove body (often placed on the top plate).
- A stovepipe thermometer measures temperature on the connector pipe (single-wall pipe uses surface readings; some double-wall setups use a probe-style thermometer).
Both can be useful. If you only choose one, pick the type that matches your stove and pipe configuration and follow the manufacturer guidance.
Where to place a stovepipe thermometer
For a standard magnetic stovepipe thermometer on single-wall black connector pipe, the most common placement is on a straight section of pipe above the stove, where it’s easy to read and not affected by elbows.
A good general placement guideline is:
- about 18 inches above the stove collar on the stovepipe (or as recommended by the thermometer manufacturer)
Avoid placing it:
- directly on an elbow (temps can be inconsistent)
- too close to the stove collar (readings can spike quickly)
- on double-wall connector pipe if the thermometer isn’t designed for it
If you have double-wall connector pipe, many setups use a probe-style thermometer designed for that pipe type. Always match the thermometer to your venting style.
Where to place a stove top thermometer
A stove top thermometer is typically placed on the top surface of the stove, often centered or slightly toward the front (depending on stove design). If your stove has a cooktop area or specific hot zones, follow the stove manual for the recommended location.
Some stoves have more accurate measurement points than others. The goal is consistency: use the same spot every time so you can learn what your stove “likes.”
Which temperatures matter for wood stove efficiency
Exact temperature targets vary by stove model, fuel, chimney setup, and thermometer type. Your stove manual is the best source for safe operating ranges. That said, most wood burners use thermometers to avoid two common extremes:
- too cool (smoldering, more smoke, more creosote)
- too hot (overfire risk)
Many thermometer dials include labeled zones to help you stay in a cleaner burning range. Focus on stable, active combustion and avoid long low smolder burns that create heavy soot and creosote.
How to use thermometer readings (simple stove tips that work)
Use your thermometer as feedback during the burn cycle.
At startup, aim for a hotter fire to warm the flue and establish draft. Once the load is burning well and the flue is warm, reduce the air gradually until the fire stays active but controlled. If temperatures drop quickly after you cut air, you may have reduced it too far too soon.
When reloading, use the coal bed to ignite new wood quickly. A fast, clean relight helps keep smoke down and supports better wood stove efficiency.
If you see consistently low temps and smoky exhaust, change one variable at a time: use drier wood, build a hotter startup, or adjust air settings more gradually. If you see consistently very high temps, reduce load size, adjust air sooner (but not to smolder), and confirm gaskets and air controls are functioning properly.
Common thermometer mistakes to avoid
A few issues can lead to misleading readings or poor habits:
- using a magnetic stovepipe thermometer on double-wall pipe (wrong tool for the job)
- moving the thermometer around and comparing inconsistent readings
- relying on a single number instead of watching trends through the burn
- choking the air down too early because the stove “looks hot”
- ignoring fuel quality; wet wood will fight every efficiency goal
A thermometer is most useful when you pair it with seasoned wood and consistent burn technique.
Final thoughts
A wood stove thermometer and a properly placed stovepipe thermometer can help you burn cleaner, reduce creosote risk, and improve wood stove efficiency without guesswork. Choose the right thermometer for your setup, place it in the correct location, and use it to make small, steady adjustments throughout the burn.
If you need help choosing the right thermometer or venting setup for your stove, contact our certified hearth professionals at 888-418-0005 or info@woodstovepro.com.
Electric Fireplace Safety Basics: Placement, Clearances, and Best Practices
Author: Sean Summers, NFI Master Hearth Certified Technician – WoodstovePro.com
Electric fireplaces are popular for a reason: they’re clean, easy to use, and don’t require venting.
But let’s be clear; “no flame” doesn’t mean “no risk.”
An electric fireplace still produces heat, draws power, and needs proper spacing and airflow. Following a few simple rules for electric fireplace safety will help you avoid overheating, damage to walls or furniture, and electrical issues - especially if you’re installing a plug-in electric fireplace in a busy living space.
This guide covers the safety basics homeowners should know before mounting, building in, or placing an electric fireplace.
Why electric fireplace safety still matters
Electric fireplaces create heat with internal heating elements and circulate warm air through vents. If those vents are blocked, the unit can overheat or shut off. If the unit is installed too close to combustibles or plugged into an overloaded circuit, you can create unnecessary risk.
Most electric fireplaces include built-in safety features like thermal cutoffs, but safe placement and correct electrical use are still essential for long-term performance and peace of mind.
Placement basics: choose a spot that supports airflow
The safest placement is where the fireplace can “breathe.” That means keeping heater outlets and intake vents unobstructed.
Good placement guidelines include:
- keep the front heater outlet clear of rugs, baskets, furniture, and décor
- avoid placing the unit directly under curtains or low-hanging fabrics
- keep the area around the unit free of clutter that can trap heat
- avoid drafty locations where heat output won’t circulate well (near exterior doors)
For wall-mounted models, make sure the mounting surface and anchors are appropriate for the unit’s weight and that the unit sits level so vents operate as designed.
H2: Clearance requirements: what to keep away from the heater
Clearance requirements vary by model, so the owner’s manual is always the final authority. In general, the most important clearance is in front of the heat outlet and around any intake vents.
Common clearance best practices include maintaining space in front of the heater discharge so heat can flow freely, keeping combustibles like pillows, blankets, paper, and décor away from the heat path, and not mounting shelves, TVs, or artwork where the manufacturer says heat may rise or vent.
If you’re building a feature wall or surround, pay close attention to the manufacturer’s specified clearance requirements so the unit isn’t boxed in too tightly.
Plug-in electric fireplace rules: power, cords, and outlets
A plug-in electric fireplace is designed to run from a standard outlet, but how you power it matters.
For safe operation:
- plug directly into a wall outlet whenever possible
- avoid extension cords (they can overheat under continuous load)
- avoid power strips for heater use unless the manufacturer explicitly allows it
- confirm the outlet is grounded and in good condition
- if the circuit trips or the plug gets warm, stop using the heater and have the circuit evaluated
If you’re running the heater frequently, a dedicated circuit may be a smart upgrade - especially in older homes where multiple high-draw devices share the same line.
Wall-mount vs built-in installs: safety differences
Wall-mounted units generally need solid mounting and proper clearance above and below the unit. Built-in installations look great, but they require extra attention to airflow and spacing.
If you’re doing a recessed or built-in install:
- follow the exact rough-opening dimensions in the manual
- do not block intake or exhaust vents with trim or surround materials
- plan access for service or replacement in the future
- consider professional electrical help if hardwiring is required or recommended
Many safety issues happen when a unit is framed in too tightly, causing heat to recirculate rather than vent.
Best practices for homes with kids and pets
Electric fireplaces are often chosen for kid- and pet-friendly homes, but the front surface can still get hot when the heater is on.
Simple best practices:
- treat the unit like a space heater when heat is running
- keep a clear “no-touch zone” in front of the heater outlet
- use the timer function to prevent unattended long runs
- teach kids that the fireplace is not a toy, even if the flames are visual
Final thoughts
Electric fireplaces are a safe, convenient heating option when installed and used correctly. Prioritize electric fireplace safety by choosing smart placement, respecting clearance requirements, and powering your plug-in electric fireplace from a proper outlet without shortcuts. With good airflow and good habits, you’ll get reliable ambiance and comfortable heat with minimal maintenance.
Need help choosing the right electric fireplace style for your space or confirming placement best practices? Contact our hearth professionals at 888-418-0005 or info@woodstovepro.com.
Recent posts
- Wood Stove Summer Storage Tips
- Chimney Relining 101: Signs You Need a New Liner and What to Expect
- Choosing a Gas Fireplace for Your Space: Insert vs Built-In vs Log Set
- Outdoor Fireplace Maintenance: Cleanup and Rust Prevention
- Class A Chimney Install Planning: Straight-Up vs Through-the-Wall Layouts
- Firewood Buying Guide: How Much Wood Do You Need for a Season?
- Gas Fireplace Glass Cleaning + Soot Causes: How to Fix Blackened Glass
- Choosing Fireplace Accessories by Style: Modern vs Rustic vs Traditional
- Wood Stove Chimney Height FAQs: Common Height Mistakes That Hurt Draft
- Pellet Stove Deep Clean Checklist: Mid-Year Tune-Up for Peak Performance
© 2006-2026 E-Prosites